Your Cart is Empty
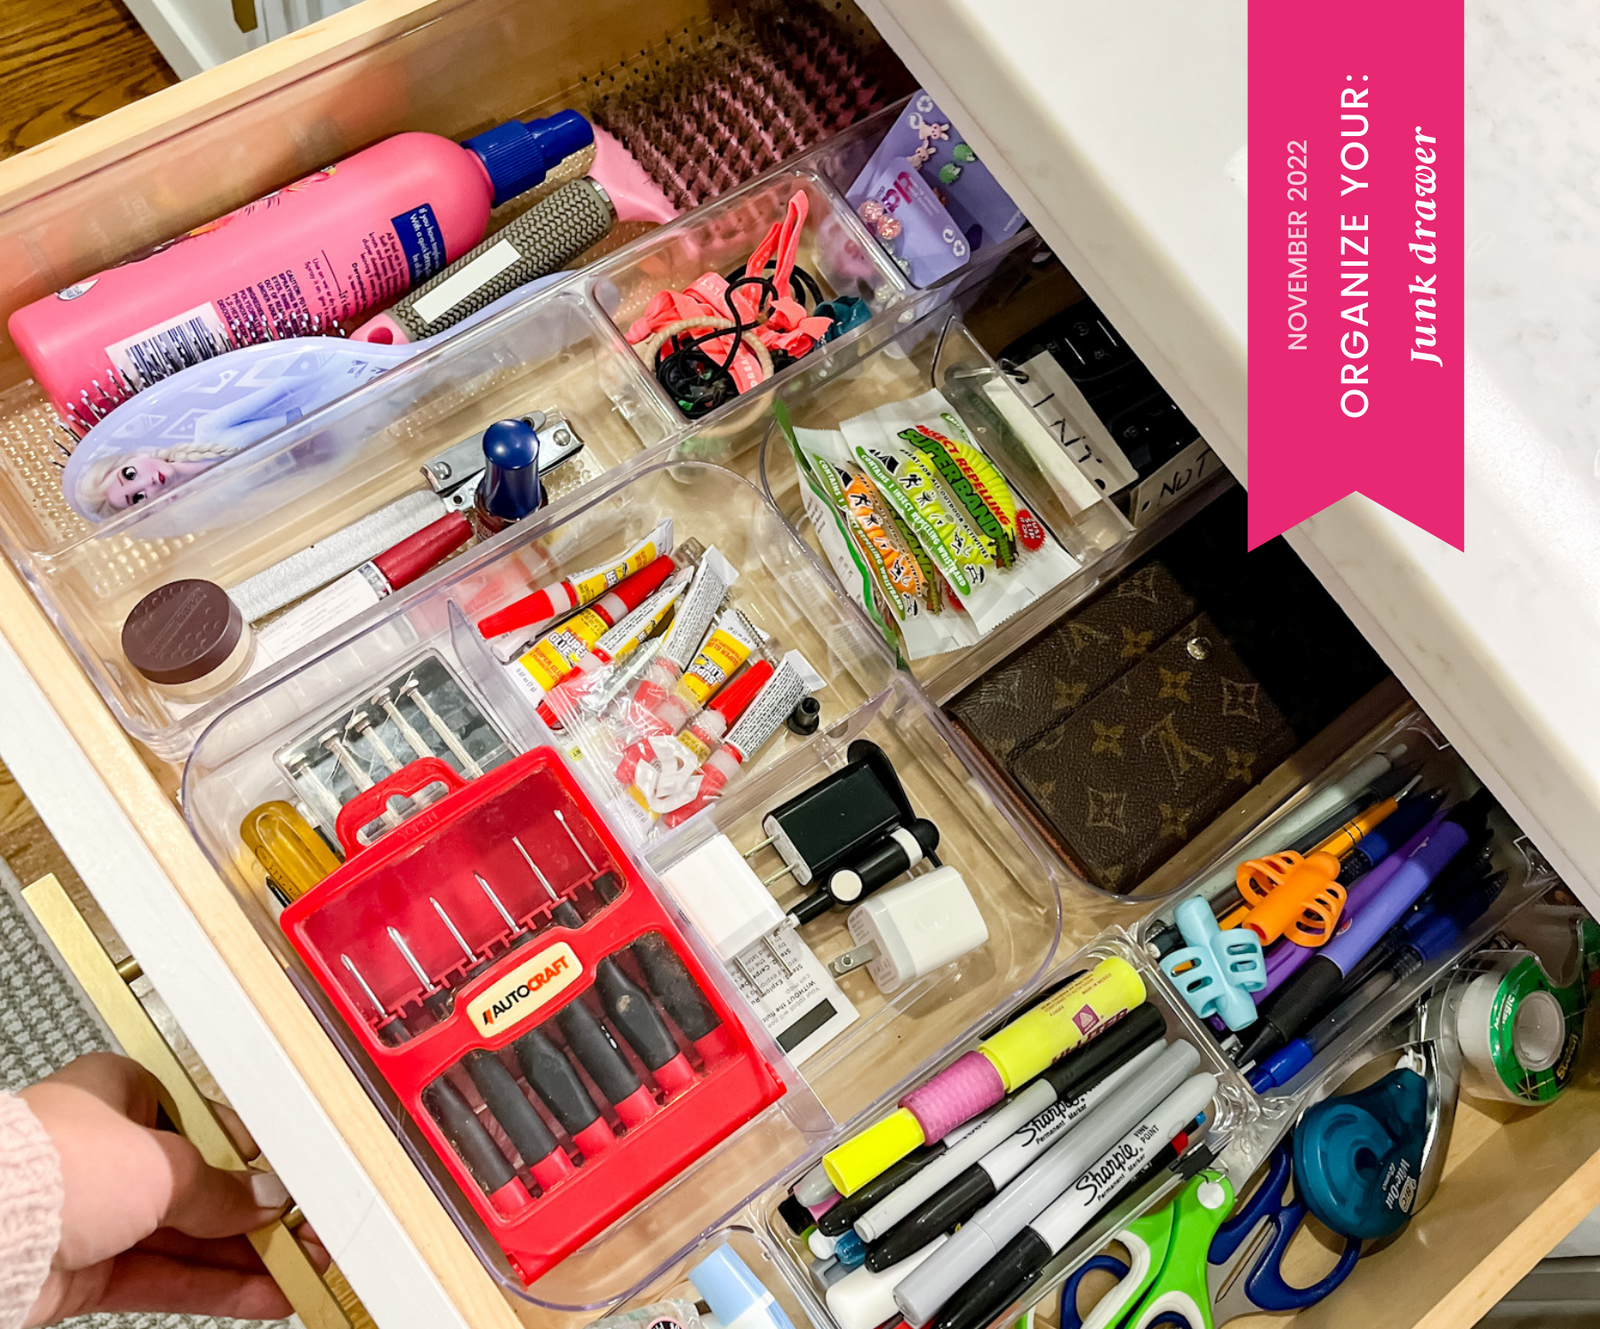

Junk Drawer Makeover
This month we are tackling a pesky little space that always seems to be a BIG mess... The Junk Drawer!
Let's face it... even the most organized people have a junk drawer. We all have that place that items just seem to collect. Whether it is items shoved out of view when guest are coming, things that have no designated home, or items you are always reaching for there is a way to make this space work for you!
Organizing this space is a project anyone can do in an afternoon.
ORGANIZE YOUR: junk drawer

1. EMPTY THE SPACE | the best way to get started on this project is with a clean slate. I chose to clear off my counter top place the contents of the drawer there. (If your junk drawer is anything like mine you will need to wipeout all the extra junk and dirt).
2. PURGE + PUT AWAY |now that you can clearly see all the contents of your drawer it is now time determine what is junk and what is worth keeping. Some items have a different home and need to be put away in that space, while others you will keep here.
3. GROUP LIKE ITEMS | go through the items you decided to keep in your 'junk drawer' and group them. I chose to use broad categories like home items, hair items, writing utensils. It is easier to keep items organized when they don't have to fit into an overly specific space.
4. MEASURE AWAY | grab your measuring tape and get going. There is a space in the front of The Plan to record your measurements. You'll use these to figure out which products will fit in your space. I added some of my favorite products for this space below!
5. PLACE PRODUCTS | place your products think about what needs to be easiest to reach and what feels natural. Once you pick a layout, use museum putty to secure your product so it doesn't slide around (even when the kids slam the drawers).
6. FILL THE DRAWER |add your items back into their new homes! It doesn't have to be pretty, the focus here is making a space that you can keep organized overtime.
SHOP MY FAVORITES: junk drawer edition
